Linear Actuator
Installation Guide
Installation Guide
1. External Lead Screw Linear Actuator + Linear Guide
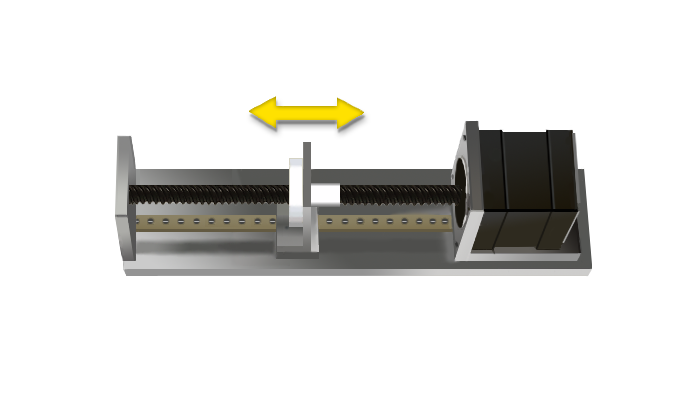
2. Non-Captive Lead Screw Linear Actuator + Linear Guide
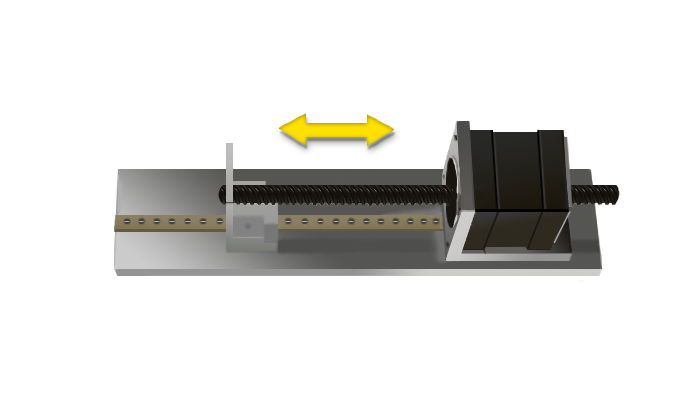
3. External Lead Screw Linear Actuator + Guided Rod
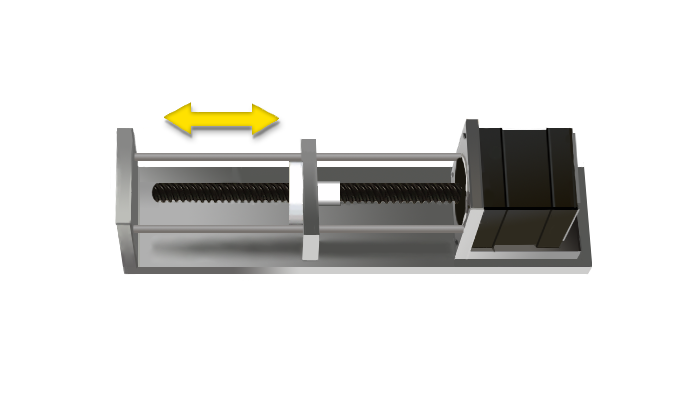
4. Non-Captive Lead Screw Linear Actuator + Guided Rod
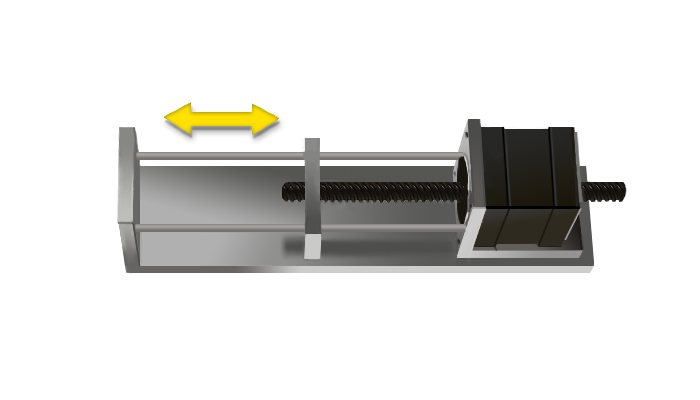
5. Electric Cylinder/Kaptive Lead Screw Linear Actuator Mounted to Load Directly
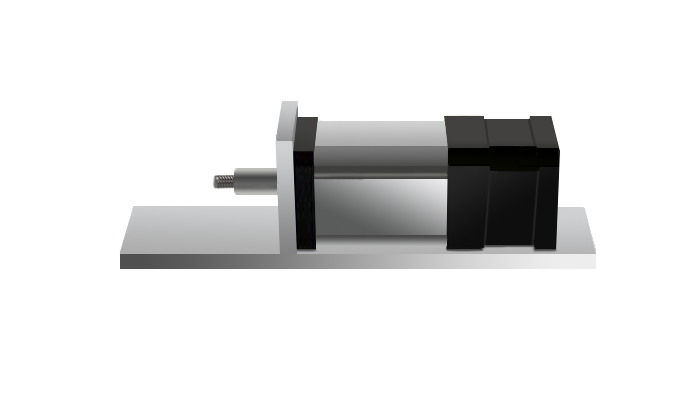
** Please select one of installation guide according to your application and it is strongly recommended from DINGS‘ to use our linear actuator in longer life cycle and for proper usage.
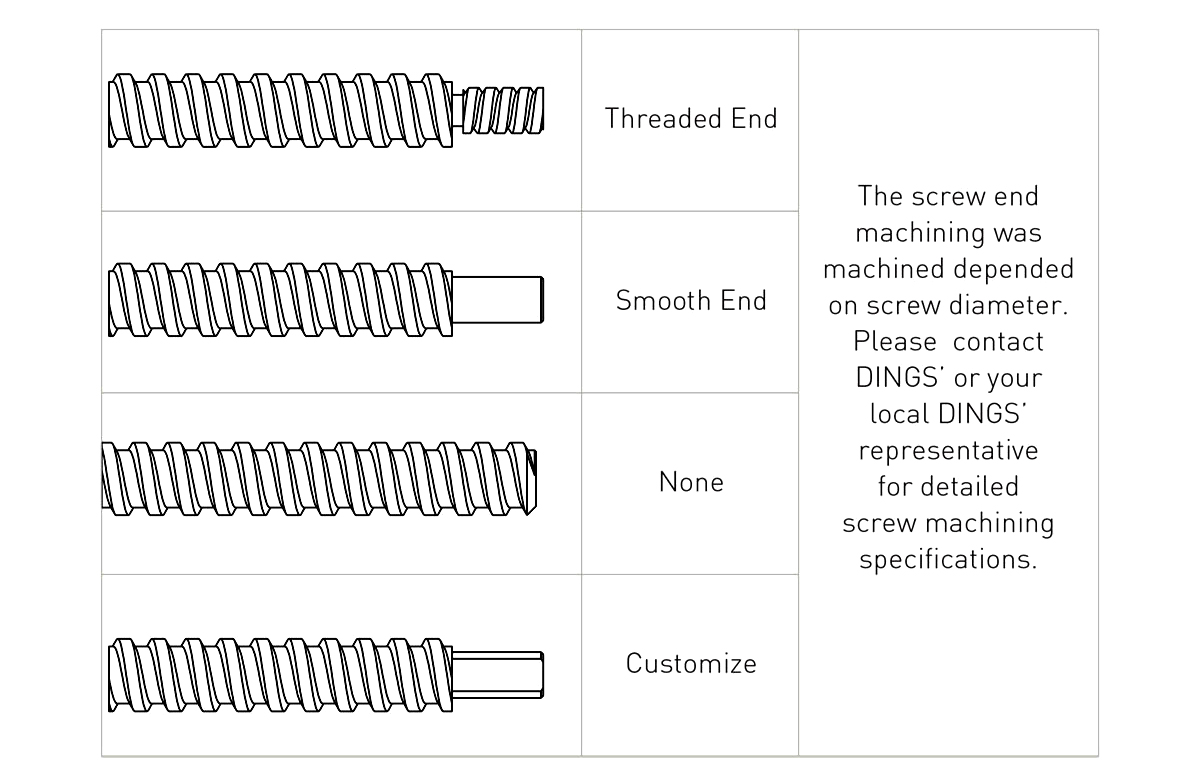
Screw End Machining
Stepping Sequence
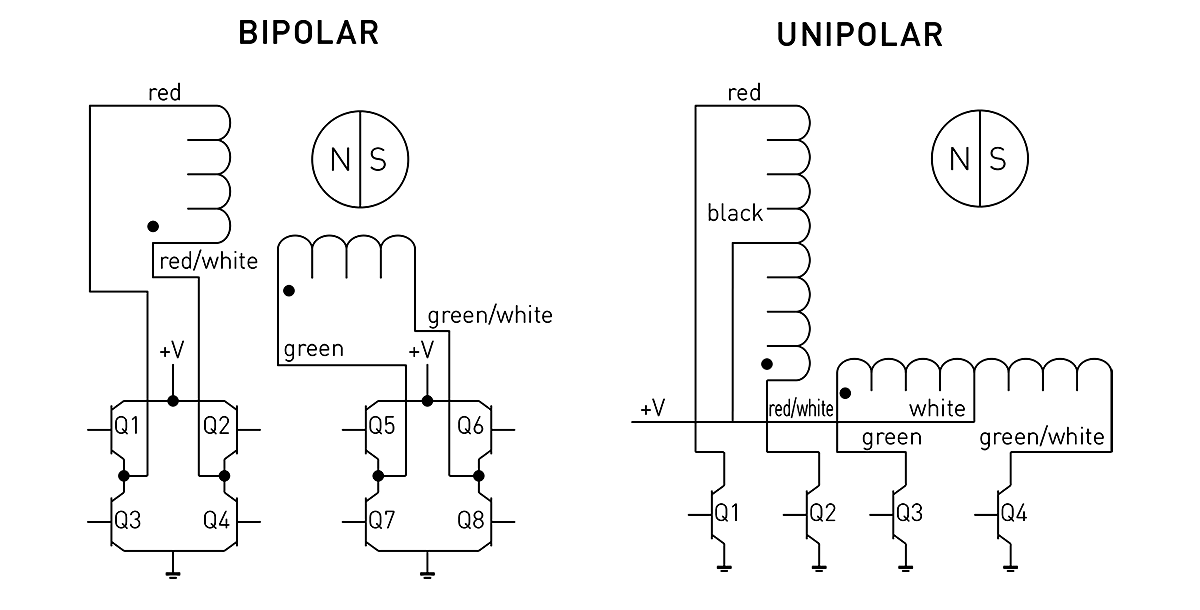
| Bipolar | Q2-Q3 | Q1-Q4 | Q6-Q7 | Q5-Q8 |
|---|---|---|---|---|
| Unipolar | Q1 | Q2 | Q3 | Q5 |
| Step | ||||
| 1 | ON | OFF | ON | OFF |
| 2 | OFF | ON | ON | OFF |
| 3 | OFF | ON | OFF | ON |
| 4 | ON | OFF | OFF | ON |
| 5 | ON | OFF | ON | OFF |
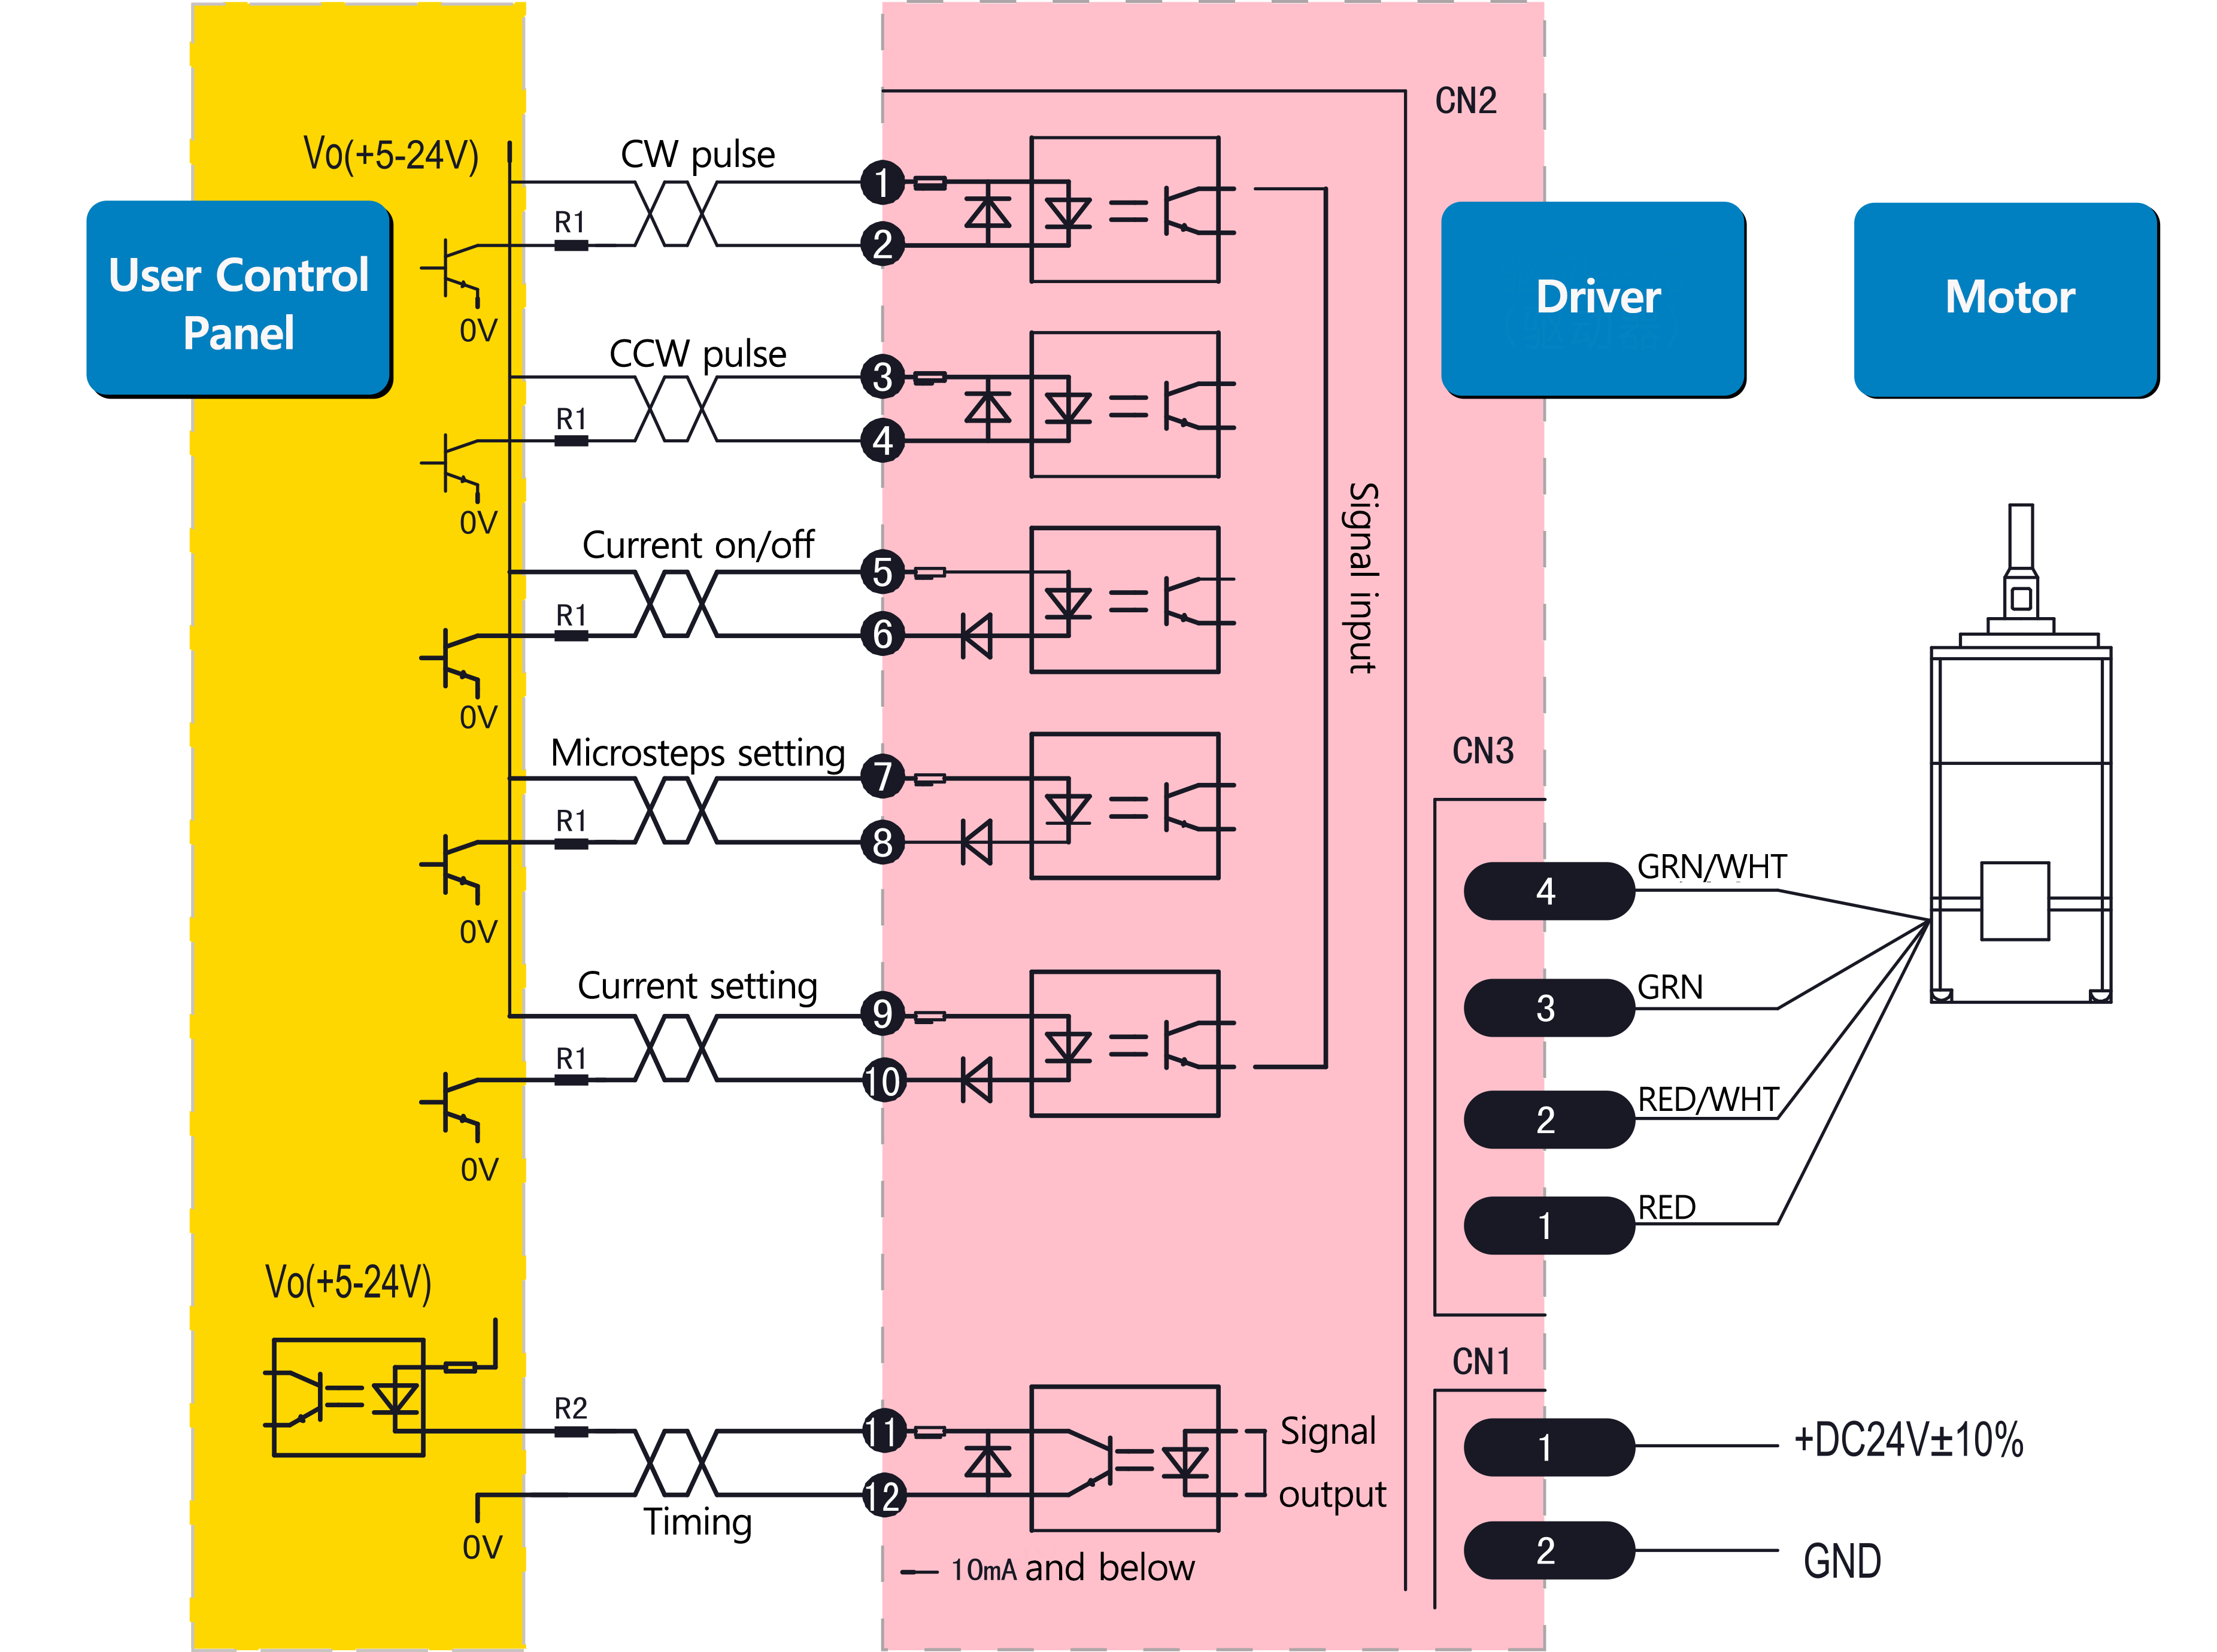
Typical Electrical Connection
External Nut Strength
| Item | Motor Size | Anti-backlash Nut | Standard Nut | Triangle/Trimming-cut Nut | Mounting Hole Dimension | Screw size customer used |
|---|---|---|---|---|---|---|
| Installation Torque /Max. | Installation Torque /Max. | Installation Torque /Max. | ||||
| 1 | 14mm | 0.8kgf.cm | 1.0kgf.cm | φ2.6/φ3.2 | M2.5 or M3 and smaller | |
| 2 | 20mm | 0.8kgf.cm | 1.0kgf.cm | φ2.6/φ3.2 | M2.5 or M3 and smaller | |
| 3 | 28mm | 0.8kgf.cm | 4.0kgf.cm | φ2.6/φ3.2 | M2.5 or M3 and smaller | |
| 4 | 35mm/42mm | 4.0kgf.cm | 5.5kgf.cm | 5.5kgf.cm | φ3.2 | M3 and smaller |
| 5 | 57mm/60mm | 6.0kgf.cm | 6.0kgf.cm | φ3.5/φ5.1 | M3 or M5 and smaller | |
| 6 | 86mm | 18kgf.cm | φ7.0/φ8.0 | M6 and smaller |
Operation Guides
Common Failure and Solutions
| Common Failure | Cause Analysis | Processing Methods |
|---|---|---|
| No Running | Poor Connection | Re-connection |
| Driver Alarm | Power Off and Re-boot after checking | |
| Actuator stuck | Remove load, ensure actuator operates smoothly without load | |
| Motor winding or insulation damaged | Contact DINGS‘ for maintenance | |
| Abnormal operation after starting up | Resonance | Enhance microsteps to change travel speed |
| Lead Screw Bend | Contact DINGS‘ for maintenance | |
| Phase Loss | Contact DINGS‘ for maintenance | |
| Vibration, Noise | Low-frequency Vibration | Adjust driver microsteps to change travel speed to avoid resonance |
| Phase Loss | Contact DINGS‘ for maintenance | |
| Abnormal heating | Over Current | Regulate current value to achieve proper rating range |
| Over Supply-voltage | Reduce supply-voltage | |
| Extended period of holding | The holding current should be halved or adjusted to smaller value | |
| Step loss | Overload on the Load Side | Reduce load or re-selection |
| No frequency raising or lowering when programming | When motor starts, it needs to be accelerated from low to high | |
| Insufficient thrust | Driver Failure | Repair or replace driver |
| Load is too high | Reduce load or resize actuator | |
| Damaged Nut | Contact DINGS‘ for maintenance | |
| Lead Screw Bend or Runout at the End of Lead Screw | Damage in Transportation or Improper installation or Improper Operation | Contact DINGS‘ for maintenance |
| Other Failures | Contact DINGS‘ for maintenance |
